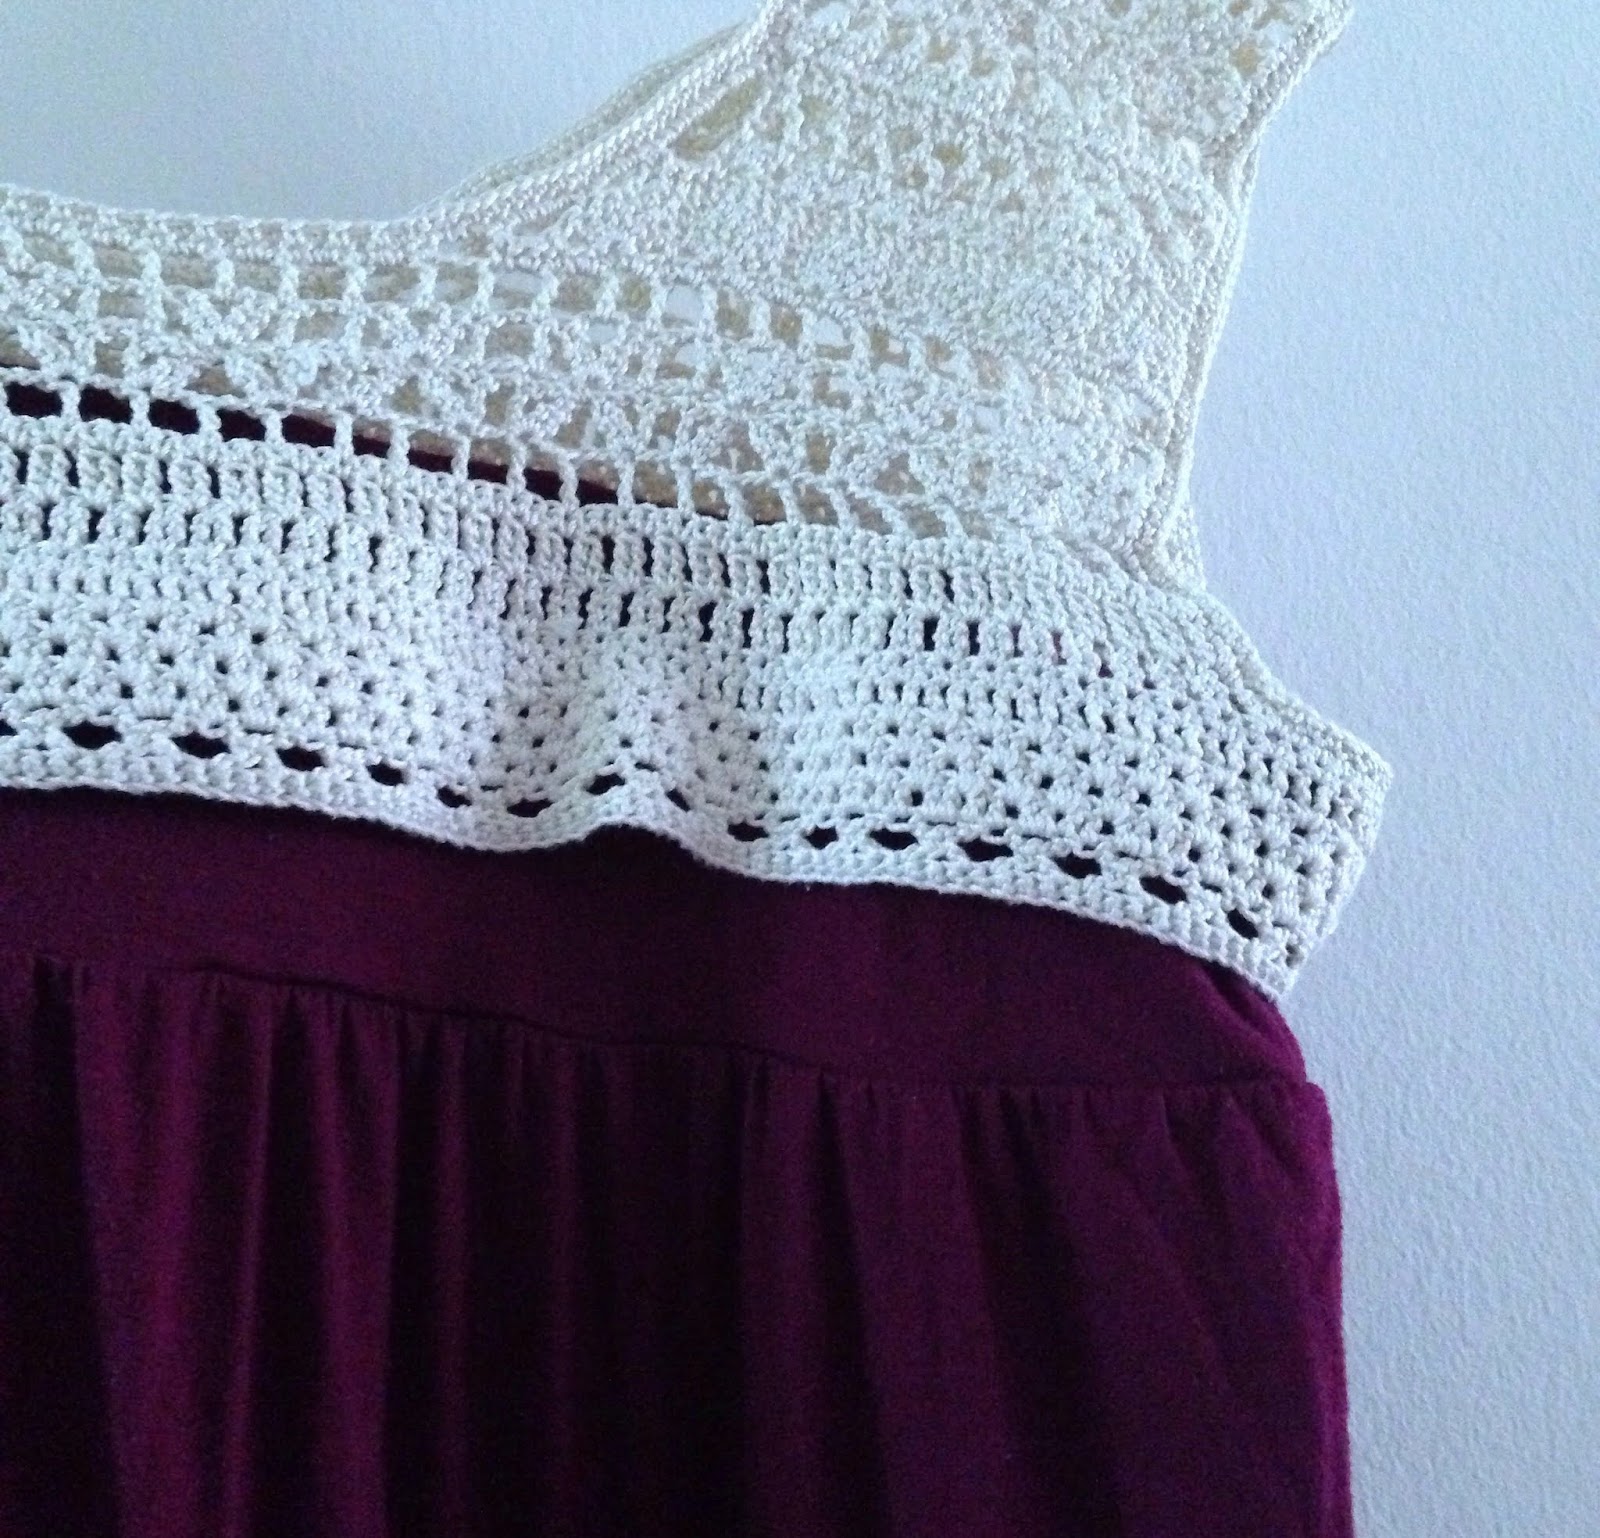
The Kíichpan Dress

The Kíichpan Dress

When making this dress, I pictured it in ancient South American culture, like the Mayans. I have no idea why, maybe because I was reading Voyage of the Beagle, by Charles Darwin, while I was crocheting this piece. I thought the book was going to be incredibly dry and I was nervous to take it on, but I was so wrong, it was perhaps one of the best books I read this year so far. I am certain the author had no intention of being so entertaining, but he was so pompous and politically incorrect that I had to take it as humor.

So, when the time came to name the dress, I looked up the word for beautiful in Yucatec Mayan, to honor the archeological expedition, That is exactly what kíichpan means, beautiful in Mayan. The word is used like, "Isn't she beautiful?" So here's the pattern!
The Kíichpan Dress
What you need:
2-3 Yards of Jersey Fabric
3 Spools of Auntie Ida's Bridal White size 3
Size D Hook
Chest Measurement
|
Chain Length
|
Front/
Back Panel
|
Arm/
Neck Hole
|
Bust Measurement
|
Chain Length
|
Front/
Back Panel
|
Arm/ Neck Hole
|
18 (6M)
|
108
|
41
|
13
|
38
|
216
|
81
|
27
|
19 (9M)
|
114
|
43
|
14
|
40
|
228
|
86
|
28
|
20 (12M)
|
120
|
45
|
15
|
42
|
240
|
90
|
30
|
21 (24M)
|
126
|
47
|
16
|
44
|
252
|
95
|
31
|
22 (3/4T)
|
132
|
50
|
16
|
46
|
264
|
99
|
33
|
23 (5Y)
|
138
|
52
|
17
|
48
|
276
|
104
|
34
|
24 (6Y)
|
144
|
54
|
18
|
50
|
288
|
108
|
36
|
26 (7Y)
|
156
|
59
|
19
|
52
|
300
|
113
|
37
|
28 (8Y)
|
168
|
63
|
21
|
54
|
312
|
117
|
39
|
30 (10Y)
|
180
|
68
|
22
| ||||
32 (12Y)
|
192
|
72
|
24
| ||||
34 (14Y)
|
192
|
72
|
24
| ||||
36 (16Y)
|
204
|
77
|
25
| ||||
Special Stitches
2Tr-Puff Stitch
- 2yo, insert hook pull yarn through, yo pull through two, yo pull through two more, 2yo, insert hook through the same stitch and pull yarn through (six loops on hook now) yo, pull through two, yo pull through two more, yo pull through rest of loops.
Stitch Pattern 1

- Ch6, sk3sc, "tr in next sc, sk2sc, ch2," across to the end. Turn.
- Ch6, "tr in next tr, ch2,2tr-puff in same tr, sk ch-sp and next tr,2tr-puff in following tr, ch2, tr in same tr,ch2," across to the end. Turn.
- Ch3, sc in next tr, "ch2, sc in space between tr-puff stitches, ch2, sc in tr, ch2, sc in next tr," across to the end. Turn.
- Ch6, Sk sc"Tr in next sc, sk ch2-sp, 2tr-puff in net sc, ch3, 2tr-puff in same sc, tr in next sc, ch2," across to the end, Turn.
- Ch6, sk tr, "tr in next tr, ch2, tr in ch3-sp, ch2," across to the end. Turn.

Pattern 2
- Ch1, sk3, "6tr in next sc, sk2, sc in next sc, sk2," across to the end. Turn.
- Ch4, tr in each tr across. Turn.
- Ch3, sk2, "3dc in next tr, sk2," across to the end. Turn.
- Ch6, "sc in between 3dc-fan, ch5," Repeat across. Turn.
- Ch3, "dc in ch5-sp, ch2," across to the end. Turn.
- Ch3 dc in first dc,"dc,ch,dc" in each ch2-sp across. Turn.
- Ch3, 3dc in between each "dc,ch,dc"- cluster. Turn.

The Collar
- Ch (according to your bust size the coordinating length for the ch. Join ch on another side to create a circle. Ch2 and sc around to first sc. SlSt,
- Ch4, 2yoh, insert hook into second so from hook, yoh, pull through two loops, yoh, sk2sc, insert hook, yoh, pull through two loops, yoh, pull through two more loops, yoh, pull through two more loops, yoh, pull through last two loops, ch2, yoh, insert hook through two loops in the center of the "x" shape, yoh, pull through two loops, yoh, pull through last two loops, 2yoh and insert into next sc to start next "x" shape, continue until end.
- Dc in each stitch and 2dc in each ch2-sp. continue around.
- Ch3, sk2dc, "2dc in the dc posts, sk2dc" repeat to end and dc next to ch and join with slst.
- Repeat once more.
- Ch4, sk2dc, "2tr in the dc posts, sk2dc" repeat to end and tr next to ch and join with slst.
- Ch2, sc around, join with slst,
- At this point refer back to the chart to start working on the front panel, (according to the desired size, work this row for the allotted stitches), Ch4, "sksc, 2tr-puff in next sc, ch," across for allotted front panel stitches.Turn piece.
- Slst to first ch-sp, Ch4, "sksc, 2tr-puff in next sc, ch," across for allotted front panel stitches.Turn piece.
- Ch1,Sc across. Turn.
- Stitch Pattern 1
- At this point you are going to shape the neck, (according to the desired size, work this row for the allotted stitches) Ch1, Sc for the number given in the neck hole column, then turn slst 3 and begin Stitch Pattern 2 during this pattern grouping leave off 3 stitches when working in the row toward the neck hole, and slst 3 stitches when working back from the neck hole.
- Continue up strap working Stitch Pattern 1 once more,
- Ch1, sc across, and turn.
- Ch4, "sksc, 2tr-puff in next sc, ch," across.Tie off.
- Repeat step 12-15 to make the other side of the front panel.
- At this point refer back to the chart to start working on the back panel, (according to the desired size, work this row for the allotted stitches), Ch4, "sksc, 2tr-puff in next sc, ch," across for allotted back panel stitches.Turn piece.
- Slst to first ch-sp, Ch4, "sksc, 2tr-puff in next sc, ch," across for allotted front panel stitches.Turn piece.
- Ch1,Sc across. Turn.
- At this point you are going to shape the neck, (according to the desired size, work this row for the allotted stitches) Ch1, Sc for the number given in the neck hole column, then turn slst 3 and begin Stitch Pattern 1 during this pattern grouping leave off 3 stitches when working in the row toward the neck hole, and slst 3 stitches when working back from the neck hole.
- Continue up strap working Stitch Pattern 2 and then Stitch Pattern 1, once more,
- Ch1, sc across, and turn.
- Ch4, "sksc, 2tr-puff in next sc, dropping the yarn oven the ch-sp on the front panel to close the opening and create a strap," across.Tie off.
- Repeat step 20-23 to make the other side of the front panel.
- Sc along neckline and arm holes to finish up.
The Skirt
- Here's the easy part! Take your fabric, I actually used an old maxi skit from Old Navy...ha-ha.
- Sew a seam on one side of your fabric, now it should be a big tube, and turn inside out.
- Sew it underneath the collar or bodice.
- Hem it and you are done, my friend! That is the joy of jersey, no pinking or pressing required

I can't wait to read Evolution of the Species now, I wonder what I will make with that book? Until then I am going to go watch Pirate! Band of Misfits, the Darwin portrays was exactly what I imagined while reading his first book.
Comments
Post a Comment